Your neck hurts. Your back aches. Your wrists are starting to feel funny after a long work session. Sound familiar?
Most digital nomads accept these discomforts as the price of location freedom. They hunch over laptops in cafes, balance screens on stacks of books in Airbnbs, and wonder why they feel worse at 35 than they did at 25.
Here's the truth: a proper remote work setup weighs under 3 pounds, fits in any daypack, and can be assembled in 90 seconds. The difference between productive pain-free work and chronic discomfort often comes down to $100-300 in gear you'll use for years.
This guide covers everything you need to build a mobile workstation that travels anywhere without sacrificing your body or your productivity.
Mobile Workstation Essentials
In this guide:
- Why Your Setup Matters More Than You Think
- Tier 1: Essential Setup ($80-150)
- Tier 2: Productivity Setup ($250-350)
- Tier 3: Full Mobile Workstation ($450-600)
- Power and Connectivity
- Setting Up Different Workspaces
- The Ergonomic Setup Checklist
- FAQ
- Related Guides
Why Your Setup Matters More Than You Think
The human body wasn't designed to stare down at a laptop for eight hours a day. When you work on a laptop placed flat on a table, your head tilts forward approximately 45-60 degrees. Your neck muscles—designed to hold your head upright—now strain to support 40-60 pounds of effective weight instead of 10-12 pounds.
Do this for a few hours: minor discomfort. Do this for a few weeks: persistent neck pain and headaches. Do this for a few years: potential permanent issues.
The research is clear. A 2019 study in the International Journal of Industrial Ergonomics found that workers using laptop stands with external keyboards reported 67% less neck discomfort and 54% less upper back pain compared to flat laptop use. Productivity metrics improved too—fewer breaks, longer focus sessions, better overall output.
The Hidden Costs of Poor Setup
Beyond pain, poor ergonomics affect your work quality in ways you might not notice:
Mental fatigue: Discomfort creates low-level stress that depletes cognitive resources throughout the day.
Shorter work sessions: Pain forces more frequent breaks, fragmenting focus.
Video call presence: Laptop cameras shooting up your nose don't project professionalism.
Long-term health: Repetitive strain injuries can take months to heal and years to fully resolve.
The Good News
A proper setup is lighter, cheaper, and easier to assemble than most nomads assume. The core solution—laptop stand plus external keyboard—weighs about a pound total and costs under $100. Add a quality mouse and you've solved 90% of ergonomic issues for the price of a few cafe work sessions.
Tier 1: Essential Setup ($80-150)
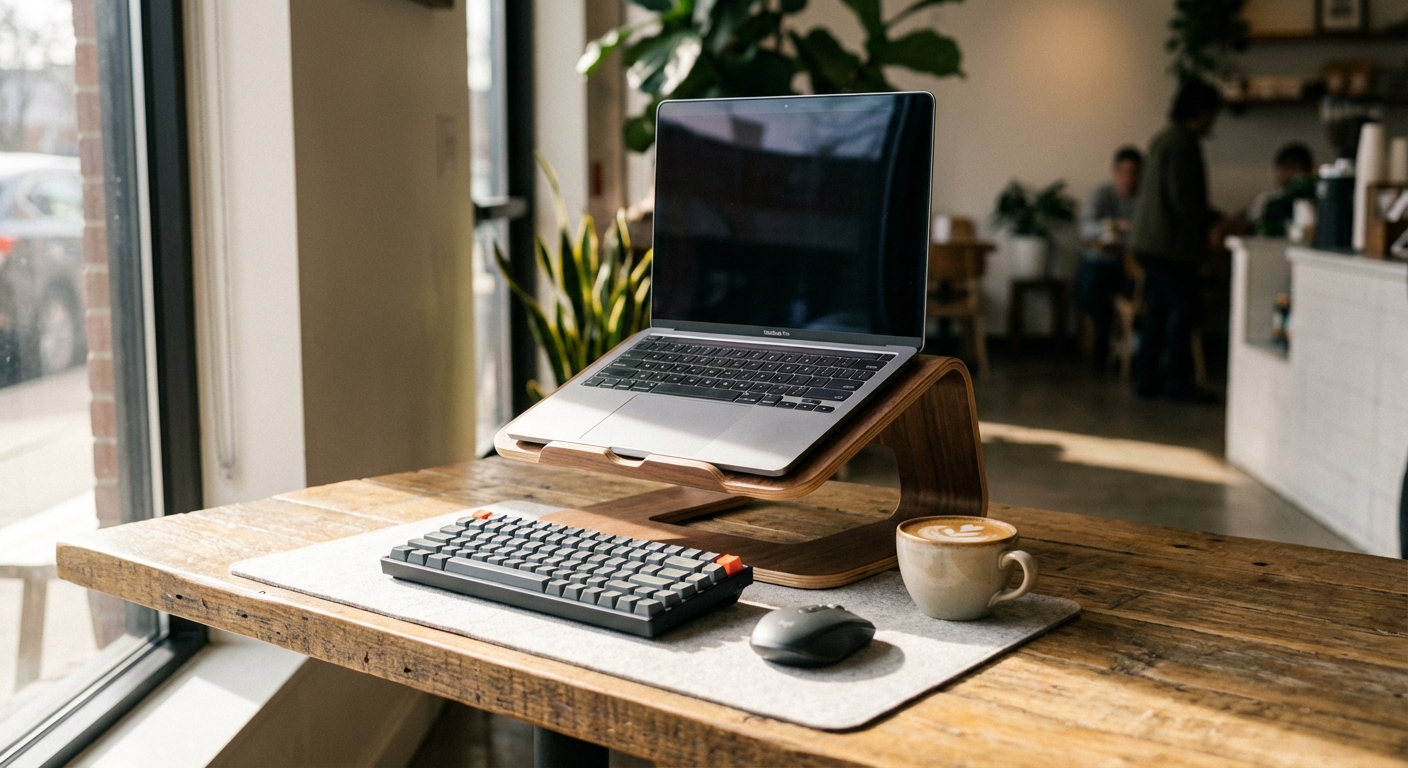
The essential setup solves the fundamental problem: getting your screen to eye level while keeping your keyboard at a comfortable height. This is the minimum viable ergonomic setup that every digital nomad should carry.
Core Components
Laptop Stand: The foundation of any mobile workstation. A good laptop stand raises your screen 6-12 inches, bringing it to eye level. Modern travel stands fold small enough to fit in a water bottle pocket.
For detailed reviews and comparisons, see our best portable laptop stands for digital nomads guide.
External Keyboard: Once your laptop is elevated, you need somewhere comfortable to type. Travel keyboards have evolved dramatically—they're now thin, light, and offer multi-device connectivity.
Our travel keyboards and mice guide covers the best options in detail.
Budget Setup Recommendations
| Component | Budget Option | Cost | Weight |
|---|---|---|---|
| Laptop Stand | Nexstand K2 | $35 | 8 oz |
| Keyboard | Logitech K380 | $35 | 14 oz |
| Mouse | Logitech Pebble 2 | $25 | 3 oz |
| Total | $95 | 1.6 lbs |
This combination gives you:
- Screen at eye level
- Comfortable typing position
- Precision cursor control
- All in under 2 pounds
Pros
- Solves core ergonomic issues
- Ultra-portable (under 2 lbs)
- Affordable entry point
- Works anywhere immediately
- Battery life measured in months
Cons
- Basic keyboard feel
- No lighting for video calls
- Single screen only
- Limited connectivity options
When Tier 1 Is Enough
The essential setup works best for:
- Nomads who change locations frequently
- Those with limited bag space or weight budgets
- Part-time remote workers who mix office and cafe work
- Budget-conscious travelers
- Anyone just starting their nomad journey
Many full-time nomads use this setup exclusively for years. It solves the primary health concerns without adding significant weight or complexity.
Tier 2: Productivity Setup ($250-350)
The productivity setup upgrades the essential components and adds tools for professional video calls. This is the sweet spot for serious remote workers who spend 6+ hours daily at their computers.
Component Upgrades
Premium Laptop Stand: The Roost V3 represents the pinnacle of portable laptop stand design. At just 6 oz, it's lighter than budget options while offering better stability and adjustability.
Premium Keyboard and Mouse: Logitech's MX series delivers professional-grade feel and features. The MX Keys Mini offers backlit keys and superior typing feel. The MX Anywhere 3S works on any surface including glass.
Webcam Upgrade: Your laptop's built-in webcam sits below your face when using a stand, creating unflattering angles. A dedicated webcam mounted at eye level dramatically improves your video presence.
Lighting: Good lighting transforms video calls more than any camera upgrade. A small portable light eliminates shadows and makes you look professional regardless of room lighting.
For webcam recommendations, see our best webcams for digital nomads guide. Lighting options are covered in our portable lighting for video calls guide.
Productivity Setup Recommendations
| Component | Recommended | Cost | Weight |
|---|---|---|---|
| Laptop Stand | Roost V3 | $100 | 6 oz |
| Keyboard | Logitech MX Keys Mini | $90 | 17 oz |
| Mouse | Logitech MX Anywhere 3S | $70 | 3.5 oz |
| Webcam | Logitech C920s | $60 | 5 oz |
| Light | Elgato Key Light Mini | $50 | 5 oz |
| Total | $370 | 2.3 lbs |
The Video Call Advantage
In an era of remote-first companies and video interviews, your on-camera presence matters. The difference between laptop webcam plus overhead lighting versus dedicated webcam plus key light is dramatic:
- Clients and colleagues see you clearly, not as a dark silhouette
- Eye contact appears natural when camera is at eye level
- Consistent lighting means consistent professional appearance
- Background blur works better with quality cameras
Many nomads find their video call setup directly impacts their earning potential—better presence leads to better opportunities.
Pros
- Premium keyboard feel for all-day typing
- Professional video call quality
- Works on any surface (glass tables)
- Backlit keys for dim spaces
- Still highly portable (under 2.5 lbs)
Cons
- Higher investment required
- More items to track and charge
- Still single screen
- Lighting requires occasional charging
When Tier 2 Makes Sense
Upgrade to the productivity setup if:
- You have regular video calls with clients or colleagues
- You type for extended periods daily
- Premium keyboard feel matters to your workflow
- You've used Tier 1 gear and want something better
- Your income depends on professional video presence
Tier 3: Full Mobile Workstation ($450-600)
The full mobile workstation adds a second screen and comprehensive connectivity. This setup rivals a home office while remaining transportable. It's for those who refuse to compromise on productivity while traveling.
Major Additions
Portable Monitor: A 15-16" portable monitor doubles your screen real estate. Modern options are thin, lightweight, and connect via a single USB-C cable. The productivity gains from dual screens are well-documented—research suggests 20-30% improvement in task completion speed.
For options across all price points, check our best portable monitors for digital nomads guide.
USB-C Hub: With multiple peripherals, you need more ports than most laptops provide. A quality USB-C hub handles your monitor, webcam, external drives, and charging through a single connection.
Our USB-C hubs for digital nomads guide covers the best options for travelers.
Desk Accessories: Once you're investing in a full setup, small additions like a desk mat, cable organizers, and monitor stand enhance the experience. See our desk accessories for digital nomads guide.
Full Workstation Recommendations
| Component | Recommended | Cost | Weight |
|---|---|---|---|
| Laptop Stand | Roost V3 | $100 | 6 oz |
| Keyboard | Logitech MX Keys Mini | $90 | 17 oz |
| Mouse | Logitech MX Anywhere 3S | $70 | 3.5 oz |
| Portable Monitor | ASUS ZenScreen 15.6" | $180 | 1.7 lbs |
| USB-C Hub | Anker PowerExpand+ 7-in-1 | $45 | 2 oz |
| Webcam | Logitech C920s | $60 | 5 oz |
| Light | Elgato Key Light Mini | $50 | 5 oz |
| Total | $595 | 4.5 lbs |
Dual Screen Productivity
The jump from one to two screens feels transformative for many workflows:
Development: Code on one screen, documentation/terminal on the other.
Writing: Research and notes visible while drafting.
Design: Full canvas on primary, tools and layers on secondary.
Meetings: Video call on one screen, shared documents on the other.
Communication: Email/Slack on secondary while focusing on primary.
The weight penalty (roughly 2 lbs for the monitor plus protection) is substantial but worthwhile for those whose work benefits from screen real estate.
Pros
- Dual-screen productivity anywhere
- Home office equivalent on the road
- Professional video call setup
- Complete connectivity solution
- Maximum workflow efficiency
Cons
- Significant weight (4-5 lbs total)
- Higher cost investment
- More complex setup/teardown
- Monitor requires careful packing
- More devices to charge and manage
When Tier 3 Is Worthwhile
The full workstation makes sense for:
- Developers and designers who need screen real estate
- Those staying in locations for 2+ weeks at a time
- Workers whose productivity gains justify the weight
- Premium Airbnb/apartment nomads (less minimalist travel)
- Anyone who has tried simpler setups and wants more
Power and Connectivity
No mobile workstation is complete without reliable power and connectivity solutions.
Power Management
USB-C Power Delivery: Modern laptops and accessories all charge via USB-C. Look for hubs and chargers that support Power Delivery (PD) at sufficient wattage for your laptop.
Multi-Device Charging: A quality GaN charger with multiple ports can charge your laptop, phone, keyboard, mouse, and headphones simultaneously. This reduces the number of chargers you carry.
Power Bank: A laptop-capable power bank (20,000+ mAh with PD) provides insurance against unreliable cafe outlets and extends work sessions during travel days.
Connectivity Solutions
USB-C Hubs: Essential for Tier 3 setups, useful for Tier 2. Choose based on the ports you need: HDMI for monitors, USB-A for legacy devices, SD cards for photographers.
WiFi Considerations: Your beautiful workstation means nothing without internet. Consider:
- Portable WiFi router for consistent connection
- Local SIM with data for backup
- WiFi analyzer apps to find the best cafe spots
Our USB-C hubs guide covers the best options for nomad connectivity needs.
Setting Up Different Workspaces
Your mobile workstation adapts to various environments. Here's how to optimize for common nomad workspaces:
Cafes
Cafes require a balance between setup complexity and social awareness.
What works: Tier 1 or Tier 2 setups. Quick to deploy, minimal table footprint.
Challenges: Variable table heights, limited outlets, ambient noise.
Tips:
- Scout outlet access before ordering
- Choose tables against walls for privacy
- Bring a small power bank as backup
- Invest in noise-canceling headphones
For comprehensive cafe strategies, see our working from cafes guide.
Coworking Spaces
Coworking offers reliability but varies widely in quality.
What works: Any tier. Fixed desks suit full Tier 3 setups.
Advantages: Reliable power, consistent internet, community.
Tips:
- Test the space with a day pass before committing
- Bring your full setup—tables can handle it
- Dedicated lockers save daily setup/teardown
Airbnbs and Hotels
Temporary homes offer privacy but unpredictable furniture.
What works: Tier 2 or Tier 3 setups. You have time to set up properly.
Challenges: Desk height varies wildly, lighting often poor, WiFi unreliable.
Tips:
- Request desk photos before booking
- Your portable light solves most lighting issues
- Consider a standing desk converter for beds/couches
- Always have a backup internet plan
Flights and Transit
Yes, you can work productively in transit.
What works: Tier 1 only. Space constraints limit options.
Tips:
- Laptop stand works on tray tables
- Download everything you need offline
- Battery management becomes critical
- Compression reduces keyboard noise for neighbors
The Ergonomic Setup Checklist
Step-by-Step Guide
Quick Posture Reminders
Every 20 minutes: Look at something 20 feet away for 20 seconds (20-20-20 rule).
Every hour: Stand, stretch, and move for 2-5 minutes.
Daily: Consider using a posture reminder app during your transition period.
For comprehensive ergonomic guidance including exercises and injury prevention, see our digital nomad ergonomics guide.
Budget Comparison: Is Premium Worth It?
The price difference between Tier 1 ($95) and Tier 2 ($370) setups raises a fair question: is premium gear worth nearly 4x the cost?
When budget gear wins:
- Frequent location changes (more wear and tear risk)
- Uncertain about long-term nomad lifestyle
- Genuine budget constraints
- Setup rarely used (primarily coworking membership)
When premium justifies itself:
- Daily use for 4+ hours
- Touch-typing where keyboard feel matters
- Regular video calls with professional expectations
- Planning multi-year nomad lifestyle
- Values durability and longevity
The Roost V3 costs nearly 3x the Nexstand K2 but weighs 25% less, folds smaller, and survives years of daily use. The MX Keys Mini costs 2.5x the K380 but offers backlit keys, superior typing feel, and rechargeable batteries.
For detailed comparisons between budget and premium options, see our budget vs premium remote work setup guide.
Standing Options for the Road
Sitting all day creates its own problems. Some nomads prefer standing desks, but most portable options compromise stability or portability.
Viable portable options:
- Using a laptop stand at maximum height on a tall surface
- Folding standing desk converters (heavier but adjustable)
- Finding standing-height tables at cafes or coworking spaces
For those committed to standing, our portable standing desk solutions guide covers the best travel-friendly options.
FAQ
Frequently Asked Questions
Related Guides
Build your perfect mobile workstation with our detailed guides:
Core Equipment:
- Best Portable Laptop Stands for Digital Nomads
- Best Travel Keyboards and Mice for Remote Work
- Best Portable Monitors for Digital Nomads
Video Call Setup:
Connectivity:
Workspace Guides:
Planning:
Your mobile workstation is an investment in your health, productivity, and career longevity. Start with Tier 1 if you're uncertain, but know that most nomads who try proper ergonomic setups never go back to hunching over flat laptops.
The discomfort you feel today doesn't have to follow you around the world. A few pounds of gear and a few hundred dollars stand between you and sustainable remote work for years to come.